

I have put together the following in order to give the basics of ear taping. I have used this, or a variation of this, method for many years. If you have any questions, please feel free to email me.
You will need to get the following supplies:
1. Men's Light Weight White Cotton Tube Socks
2. Heavy Duty Cable Ties
3. TORBOT Liquid Bonding Cement
5. Cotton Balls
6. Q Tips
7. Rubbing Alcohol
8. Hydrogen Peroxide
9. Medicated Powder
10. Neosporin Cream
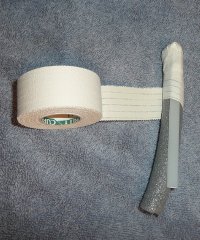
11. 2" Kendall Curity Porous Tape
12. 1/2" - 5/8" Backer Rod - Caulking Foam
14. Adhesive Remover
15. Tape Scissors
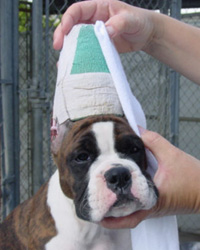
When I pick my puppies up from the vet I put a sock on each one, have done it this way for years and it has always worked well. No E-collar, no trauma to the pups. The first couple of days the sock may stick to the ear, just remove gently. I use neosporin cream or medicated powder every time I replace the sock depending on state of the ear. I have no trouble running several puppies together when they are wearing their socks. Harder to scratch and the ears are protected.
|
|
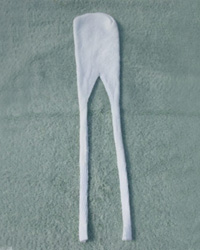
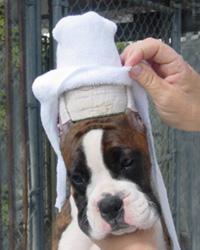
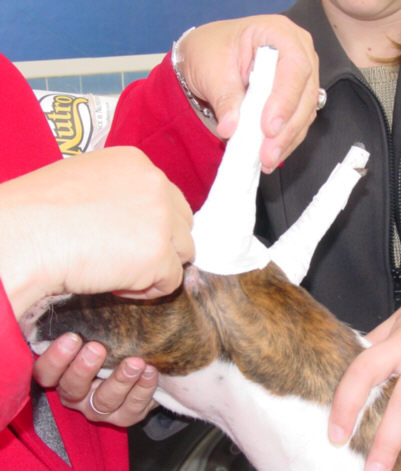
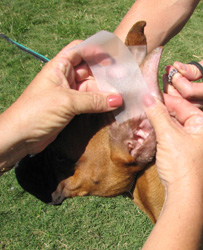
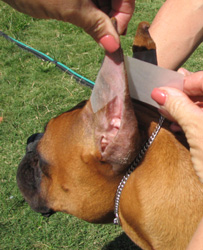
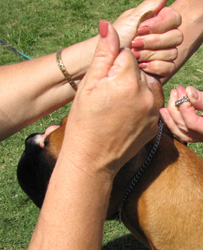
Measuring so that the end of the sock fits snugly over the top of the cup on the puppies head, cut first up the middle of the sock, and then along the edge turning in diagonally to meet the center at the top 2" to make two narrow ties with wider triangles at the top to fit over the bases of the ears, as shown in the pictures above.
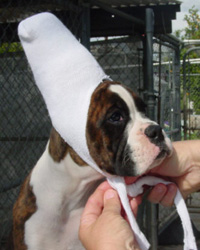
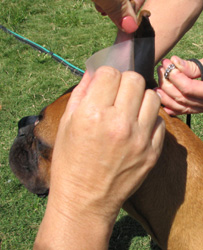
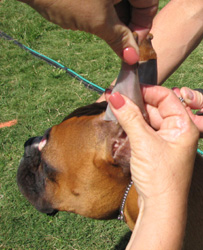
When you have gotten it on the head tie it under the chin and cut the tails off short. Change the sock daily and each time you do put a small amount of neosporin on the edge of the ears to promote healing. Use the socks until the stitches are ready to come out. You can wash the socks and use them over again and save them to use from litter to litter.
|
Between 10 and 12 days take out the stitches, being careful not to miss any as they can cause problems later on. Many times I take the top stitches out a couple of days before the base stitches, being sure to get them out before they become imbedded in the ear.
After all of
the stitches have been removed, hold the edge of the ear between your thumbs and pointer fingers and
gently squeeze and stretch to be sure that all of the bumps are out of the edge of the ear. This will
be a bit painful for the puppy, but will insure that the ear does not crimp and finishes off with a nice
smooth edge. Start at the base of the ear and work your way to the top, stretching gently, being very
careful at the top so that you do not tear the tip of the ear.
Once you have removed the stitches and
stretched the ear, clean the inside of the ear with alcohol. Use a cotton ball soaked with hydrogen
peroxide to gently clean the outer edge where you have removed the stitches. Let the puppy's ears
air out while you prepare the inserts. Do not allow the puppy to shake his head wildly as they can sometimes create a hematoma
on the tip of the ear.
There are many types of tape that you can use, but I find there is no tape that sticks like Curity by Kendall Porous tape.
Have had many, many people come to me in frustration that they just could not keep the ears in tape. Once they got the Curity they
had no problems.
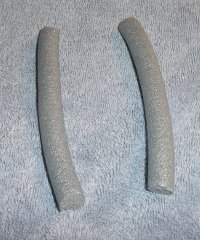
There are many taping methods that work well. Two variations of the method I use are described here. I use caulking foam or backer rod as the
basis for the ear insert. You can find this at Home Depot in the caulking section. I find this method is especially good
because there is no danger of injury to the ear canal and the ear wraps do not need to be changed as often.
If you are starting with this method just after the stitches are out and the ears are TOTALLY healed, put
foam down into the ear as far as you can GENTLY place it and cut off 1/4 in longer than the ear. Be sure to use foam
that will fit down into the ear canal opening. You can use the foam alone or reinforce it with heavy duty cable ties.
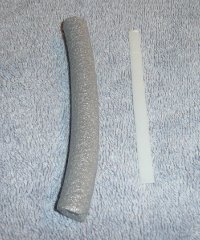
If you are reinforcing the foam with cable ties, cut the tie approximately 1/2 inch shorter than the foam
and when it is inserted into the ear be sure to insert the end that the cable tie does not go all the way down to.
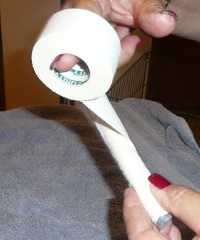
Start your tape around the foam and then wind the other way diagonally until the entire foam insert is covered with
tape, sticky side out. They are now ready to put into the ears. If you are using the foam with the cable ties, when
you start your back wrapping tape over the top of the foam insert to keep the tie from working it's way out.
Cut 6 pieces of tape per ear, 2 long, about 6 inches, and 4 shorter, starting with about 3 inches and getting gradually shorter,
then insert the foam piece into the ear and gently
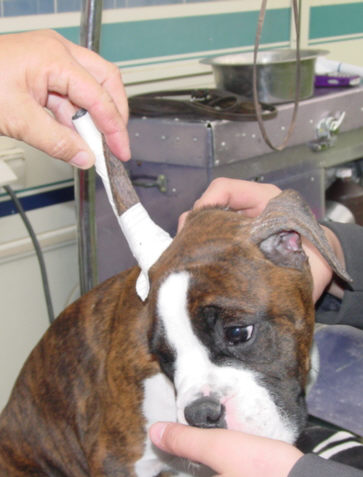
cup and squeeze the ear around the foam insert. Starting at the bottom and stretching the ear up as you go, begin
with one of the longer pieces and with the end of the tape on the inside of the ear, proceed around the ear toward
the uncut side first, keeping the flap on the uncut edge folded back.
Work up the ear in the same manner, with the 4 shorter pieces overlapping them slightly as you proceed up the ear. After you
have attached the last short piece of tape at the top, gently pull the ear as high as you can and put the last longer
piece at the bottom. Leave the very tip of the ear exposed so that you can monitor for swelling. If swelling occurs take the ears down IMMEDIATELY!
Or you can use the same inserts as described above and use minimal taping with one piece around the bottom and
one piece around the top as shown. Be sure that you gently pull the ear up before you put the bottom piece of tape
around the ear.
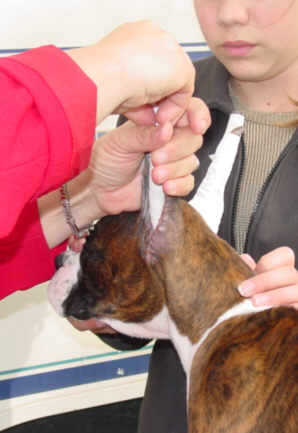
If you find the ears are listing out, not standing straight up off the top of the head, it can be helpful to use a figure 8
to help keep the ears in the proper position. Once both ears are taped in the same manner make a figure 8 out of tape pulling
the ears high on the top of the head. You will start by
pulling the ear straight up and with the tape at the very bottom of the ear, go around one
ear, over the head and around the other ear in the opposite direction. You will in essence be making a figure "8"
out of the tape. Be advised that some dogs have a lower ear set which can make getting those ears high on the head impossible.
The tape is not stuck to the top of the head, just around the ears. When taping this brace on, you must be
sure that the ears are pulled up as high as they will go and that when you
have finished with your figure 8 the ears are straight up as they would be naturally with a very high ear set. I normally leave the ears
up for 5 to 7 days. If the ears get wet, start to become misshapen, look grungy, or smell, take the tape off right away.
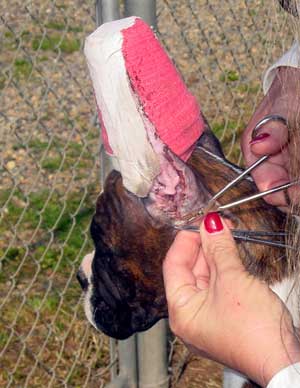
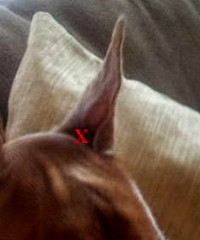
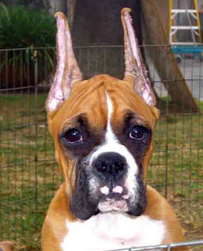
If the ear has developed a "pocket" - the ear indents at
the bottom of the ear just where it meets the head along the uncut edge - See Red X - then the flap of skin is
pulled forward and a cotton ball placed under the first piece of tape to push the pocket out. If the ears have formed pockets
do not use the figure 8 to pull them up high on the head as that will compound the problem. Once you have gotten the pocket out
you can once again use the figure 8.
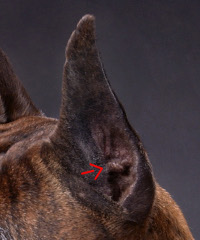
If your dog will absolutely not tolerate the posts down in the ear canal you can position the posts just down to
the ear bump - See Red Arrow - and tape in the same manner as above. Note for every taping method it is imperative that as
you tape you gently stretch the ear especially as you postion the last piece around the bottom
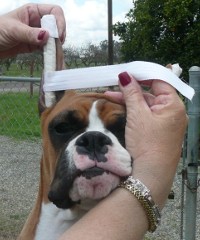
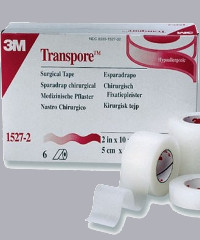
When the ears need just a little bit of help, or on a several day show circuit when I don't want
to do a major taping each day, I use Transpore Tape. Cut a piece about 4" long and position about in the
center of the ear starting on an angle and working from the inside, over the uncut edge, around and up the ear.
After you have positioned the tape on the ear, work it with your fingers to warm it up a bit and it will
stick on the ear much better. Be sure to check this tape daily as it can cut into the ear.
When using transpore tape it is not necessary to use adhesive remover to ease the tape off. When using the curity tape
it is a good idea to get actual adhesive remover from your pharmacy so that you do not pull off too much hair and it
is not painful for the puppy when you remove the tape.
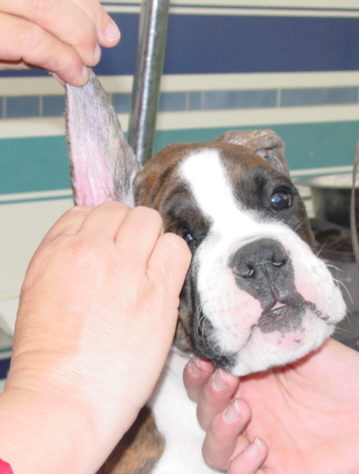
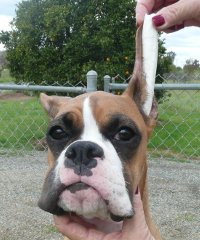
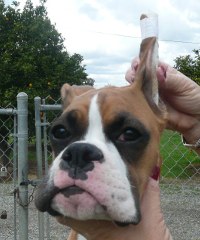
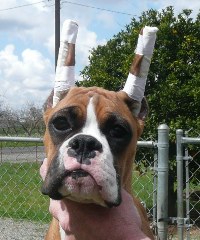
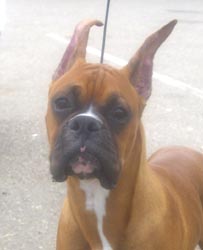
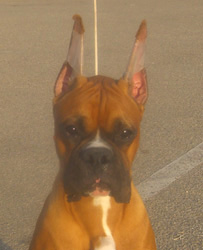
When you have finished you want the ears to look like those in the pictures below of A/C Ch. Encore's Bismark, left, freshly out of tape
at 3 1/2 months; and right, the finished product.
Being successful at ear taping is just a matter of persevering and not allowing the ears to hang for more
that a couple of hours at a time to air out. When it seems as if they will never go up, they finally do!
In the 50+ years I have been in Boxers I have never had an ear that did not go up. GOOD LUCK!


Back